≡ Menu

Fitting the 34 Roadster Cowl Wood

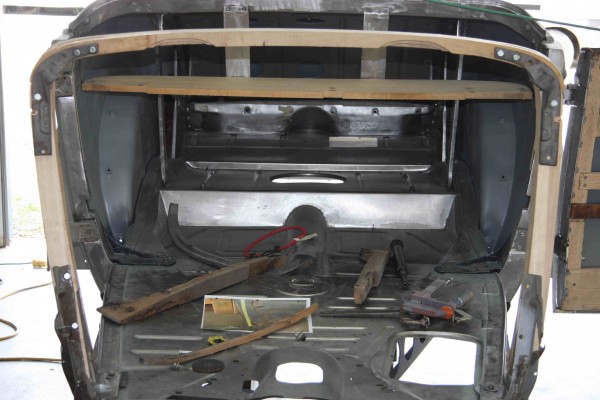
The restoration came to a halt a few weeks ago because when we went to fit the cowl wood it didn’t fit. My fault I bought the 2 cowl wood posts from Brad’s Woodshop and I found the cowl header at a swap meet thinking all 3 pieces would fit together nicely. Well in a perfect world that’s exactly what should happen but the cowl header didn’t fit correctly to the wood posts. I called Brad Brown and told him about my dilemma and Brad said to send all 3 pieces including the cowl windshield stanchion brackets back to him and he would correctly fit the pieces together.

IMG_6489

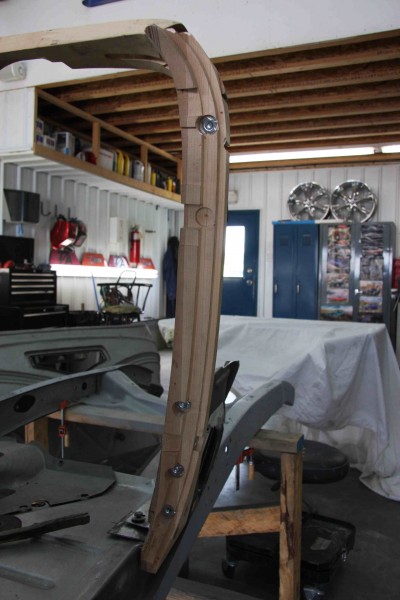
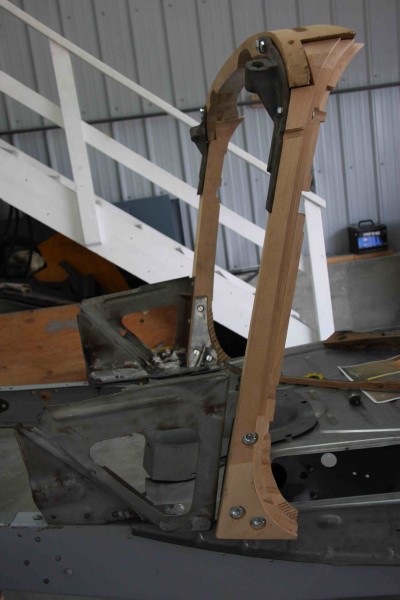
 From the front everything looks like it fits, not quite!

IMG_6491

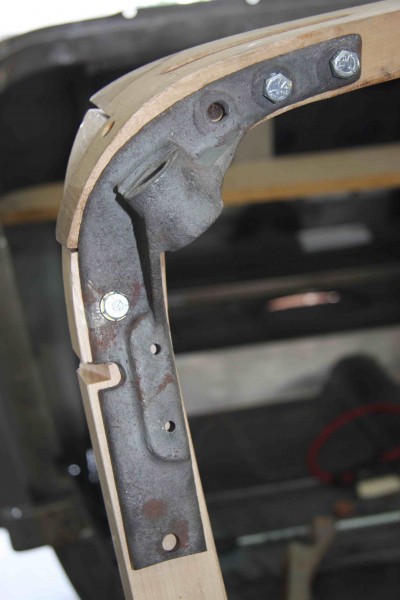
Where the cowl wood posts meet the cowl header there is a gap.

IMG_6486

At the top you can see the overlap and gap of the two pieces.

IMG_6494

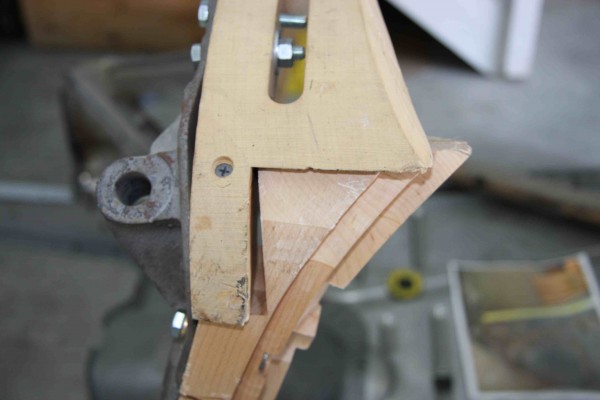
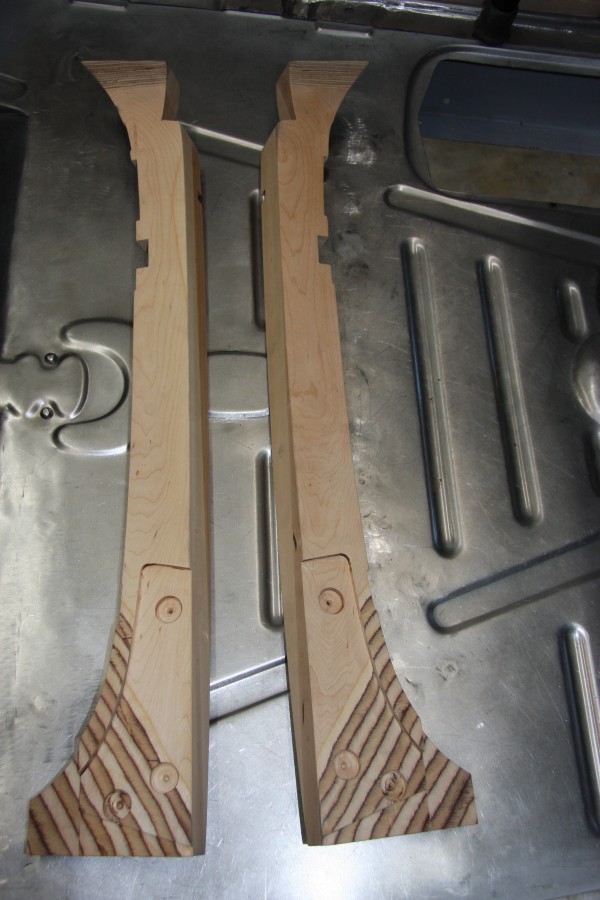
Quite the overlap and gap. One thing that I am not is a woodworker and dealing with the compound curves and angles in wood is not my forte.

IMG_6493

Not quite as noticeable in this photo.

IMG_6500

With the cowl stanchion bracket in place it doesn’t look that bad from the front.

IMG_6496

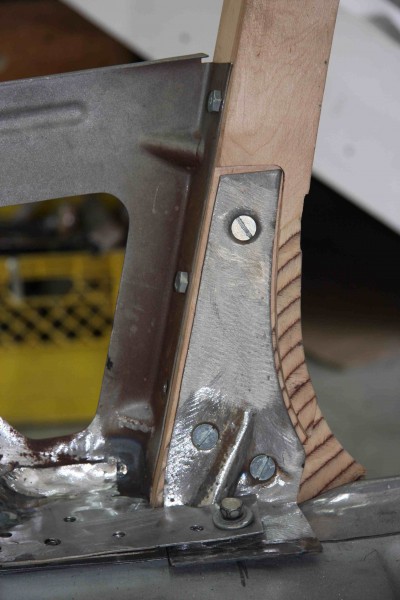
The Cowl L-Bracket fitted to the cowl posts and we still have some work to do on the A & L Brackets which will be addressed in a future post.

IMG_6503

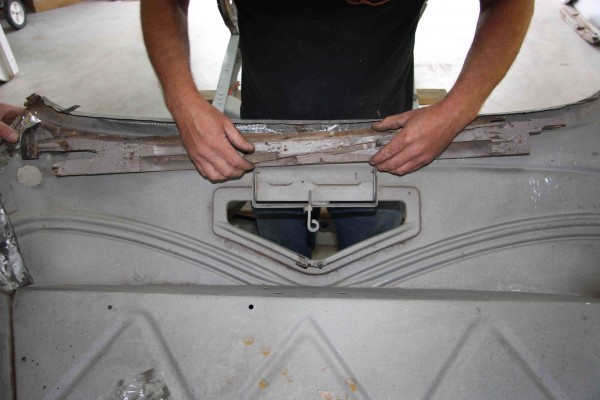
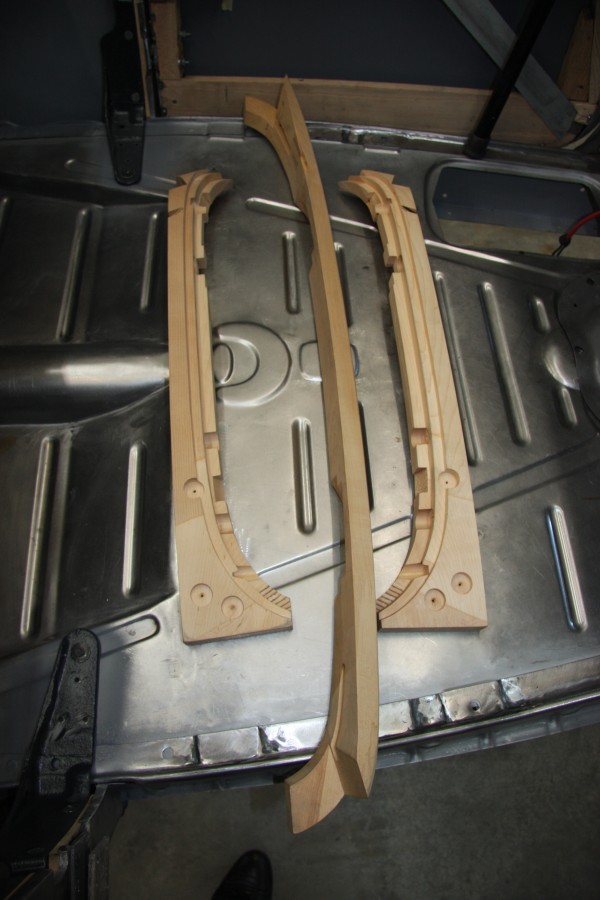
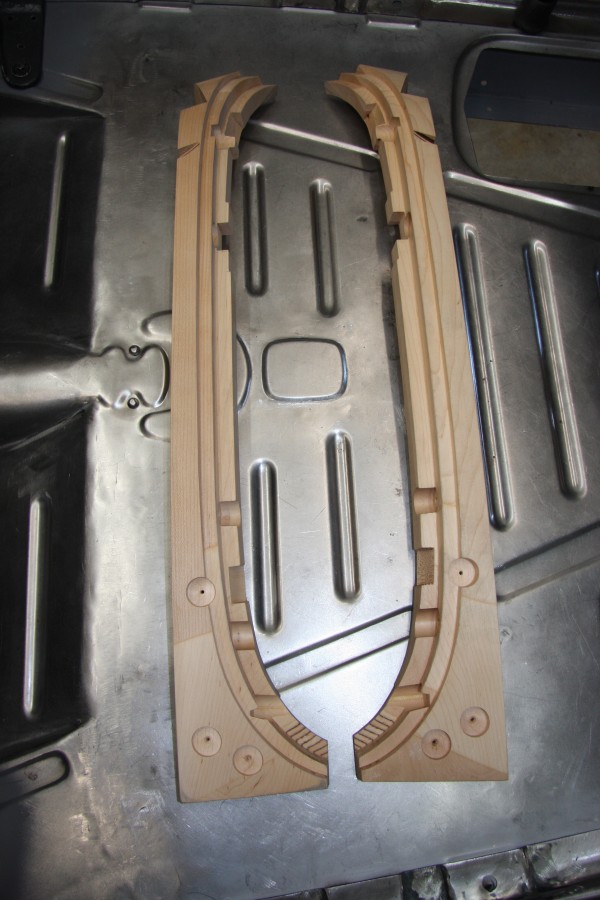
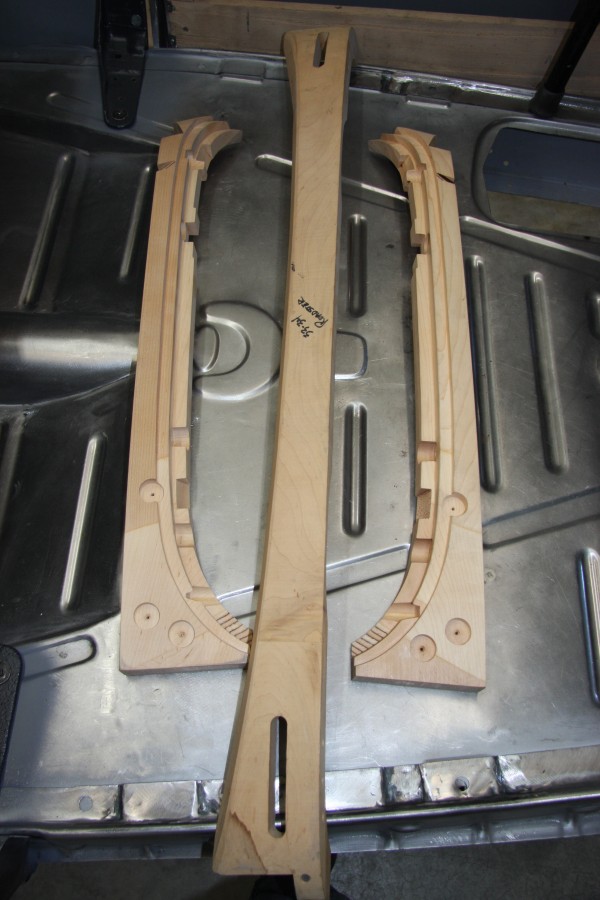
We have the original cowl wood to work with and it will help immensely in fitting all the pieces together.  However the original cowl wood had dry rot, the wood was fractured in a few places and had become significantly structurally weakened so its all being replaced.

IMG_6504

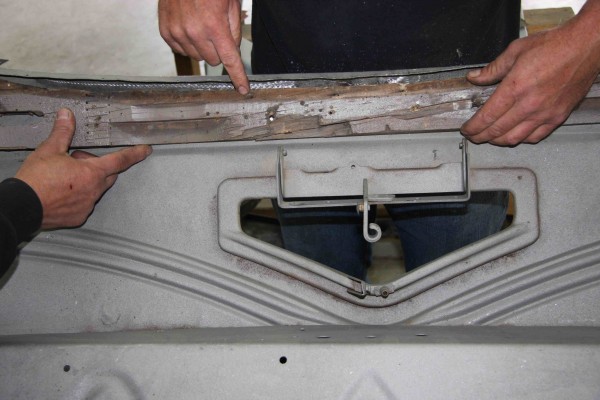
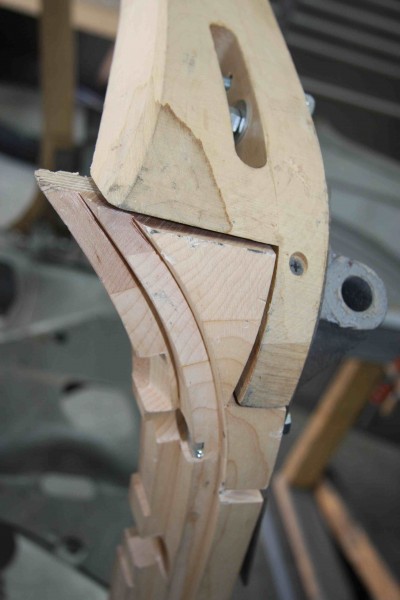
You can see the overlap of the cowl metal on the cowl header it actually fit quite tight.

IMG_6505

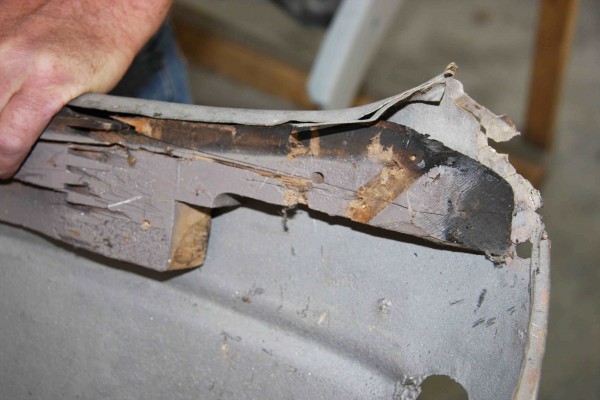
I’m told that after the cowl header wood was insatalled in the factory they would then complete the metal detail on the top corners on each side of the metal cowl, both sides of the cowl corners had been lead filled and the cowl wood is usually always burnt away in this area.  Both sides of my original cowl wood are charred in the corners. As you can see we have a little restoration work on the top corners of my cowl.

{ 0 comments }

My First Car Show

IMG_6515

Well I participated in my first car show. Not much to show but I was there! Byron always displays a Ford car that he is working on at the Calgary Mustang Club’s annual show, and this year he asked if he could take “Luella”. That’s what my wife has decided to call my 34 (after my mother). I was going to call it Henry but my wife felt that such a curvy car should have a more feminine name. So, I lost out on the color selection and the name!

IMG_6535

Just give me an engine and a set of wheels and she’d show those mustangs a thing or two!

IMG_6537

From this angle, she almost looks like a car.

IMG_6539

Here’s a pic of me (left) and Byron Valcourt.

IMG_6518

I don’t know, to me they all look the same.

IMG_6516

Now that’s more my style! This was a pretty little 1929 Model A truck. Brought back memories of my own ’28 Model A roadster. Even had that particular Model A smell.

I plan to drive back next year in a fully restored car!

{ 0 comments }

Ed Solari’s – Cowl Wood Mounting Notes

Its very fortunate that Ed and I are restoring a ’34 Roadster simultaneously. It sure is helpful to share details and discuss various areas of the roadster body. I have not yet installed the cowl wood into the cowl but when I do Ed’s notes (click link below) will be invaluable.

1934 Roadster Cowl Wood

IMG_6446

These are the A-Pillar wood support posts. When installed this side will face into the car.

IMG_6448

 This is the opposite side of the A-Pillar wood support. When they are installed this side will face towards the inside of the cowl.

IMG_6453

The piece of wood between the two A-Pillars is the wood that fits across the top of the cowl.

IMG_6452

A side profile of the upper cowl wood. These wood pieces will be installed over the next few weeks and I will post additional photos.

{ 2 comments }