≡ Menu

Cordoba Gray

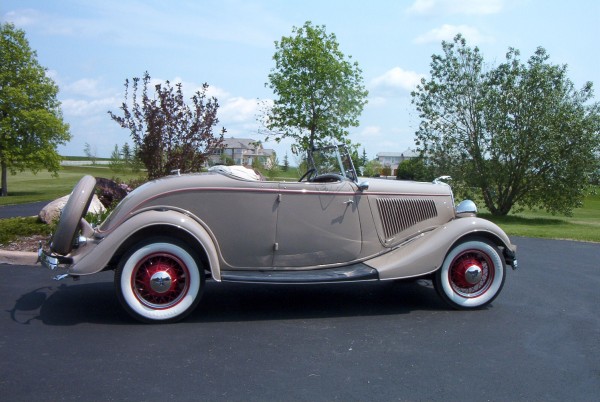
After a ton of deliberation over what color to paint the ’34, I’ve decided to go back to the color she was when I got her, Cordoba Gray. While I was tempted to paint her black, my interior designer wife kept insisting that “there is nothing interesting about black”. So, Cordoba it is.

Here’s the thing about Cordoba Gray. It’s a challenging color to reproduce, and my car’s original color wasn’t original. It also wasn’t right.

IMG_6077

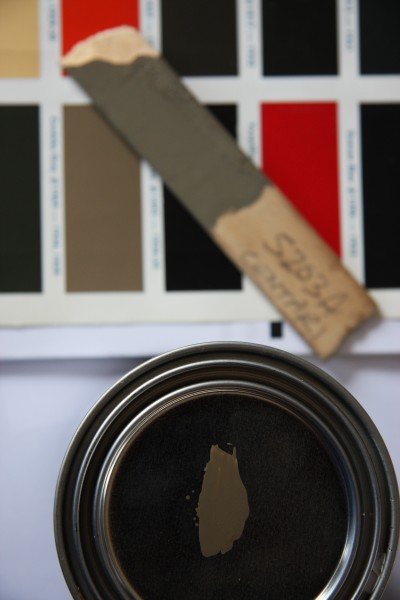
After reaching out to others on the Ford Barn forum, one of whom provided the sample on a paint stick (which seems a little too green), and a long chat with Roy Nacewicz, a (Retired) seasoned judge, I wasn’t a whole lot farther ahead in determining how to get the color right. I had the original paint spec catalog but it is printed and therefore not exactly accurate. Adding to the challenge is the fact that in North America solvent based paints have been phased out, and my body-man, Byron Valcourt, uses only water based.

The pigments are not the same so you can’t just match up the paint formula and expect it to come out right.

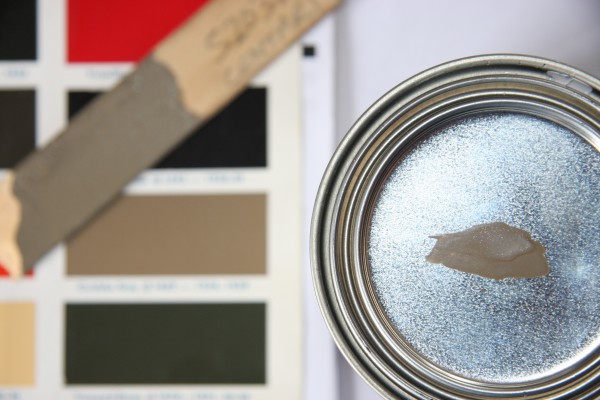
After some digging around I found a local PPG dealer. PPG has an extensive historic database. They could match the original formula to make me up a test pot, seen above. The color is close to the brochure sample so I was going to go with it. Then, another conversation with Roy has me thinking it is still too tan.

So, back to the drawing board.

If anyone, anywhere, has a small body part off of an original Cordoba Gray Ford body that I could use as a color match reference it would be a God-send. Please contact me.

My wife’s heart is set on this color, and I wouldn’t want to break her heart now would I?


{ 6 comments }

The Story Behind the Rebuild

On a warm Saturday summer afternoon I decided to take my car out for a cruise. My 34 roadster started that afternoon looking like this…

IM000984

… and came back looking like this!

ready to roll

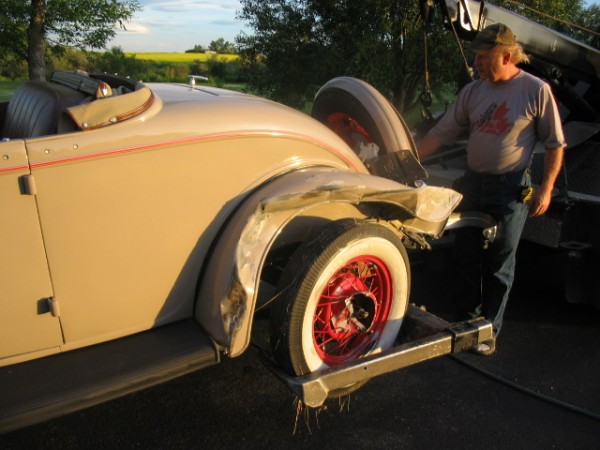
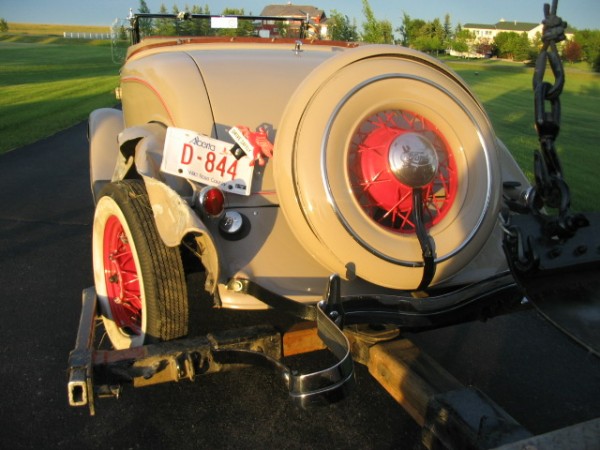
 The tow truck driver bringing the old girl home.

smashed fender

IMG_0873

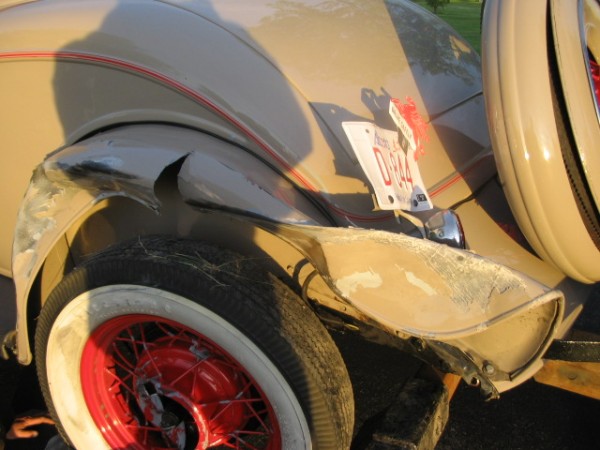
Another view of the damage and you can see the badly damaged wheel, rear axle, fender and rear bumper.

load er up

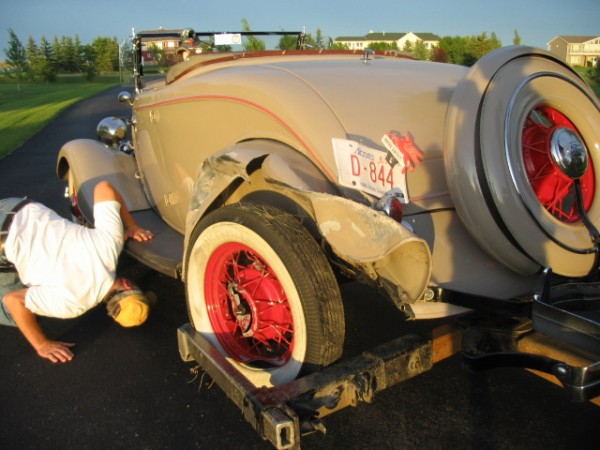
I’m inspecting the undercarriage here, but more pissed off and seething at this point in time!

At 3:00 in the afternoon I was cruising down the highway at 60 mph (100 kph for my Canadian friends) when a young drunk driver came at me head-on driving a Dodge pickup truck. I swerved to miss him and he hit me in the rear wheel, sending me into the ditch. After the impact I tried to regain control but realized, as I was skidding down the embankment of the ditch, that wasn’t going to happen. All I kept saying over and over again in my mind was “please don’t roll” and I held the steering wheel hard to the left to keep the car upright.

When I finally came to a stop at the bottom of the ditch I thanked God that I was alive and that the car did not roll. I gave my head a shake and realized that I was still in one piece! I then opened the driver’s door to confront the driver that hit me and who was in the ditch directly behind me. As I started to walking toward him he drove out of the ditch and left the scene of the accident.

Shortly after he left the scene another driver came along and stopped to see if I was alright and asked me what had happened. I explained the situation and asked him to have a look down the road for the truck that hit me. I told him that he wouldn’t be going very far because the rear bumper of my 34 had punctured the truck’s front tire. I could hear the tire flapping on the pavement as he had driven away. The truck was found about a mile down the road. The driver was gone. I called the RCMP, filed an accident report and towed my roadster home. Later in the day the RCMP informed me that the drive had turned himself in at around 11:00 PM.

It wasn’t until a little later on that I began to realize just how lucky I was to not have suffered any injuries, though it had taken me a minute to figure out where the glass that was imbedded in the left side of my face came from. The truck’s outside mirror had struck my roadster’s wind-wing and some of the broken glass had hit me in the face. Fortunately I had sunglasses on.

 IMG_0883

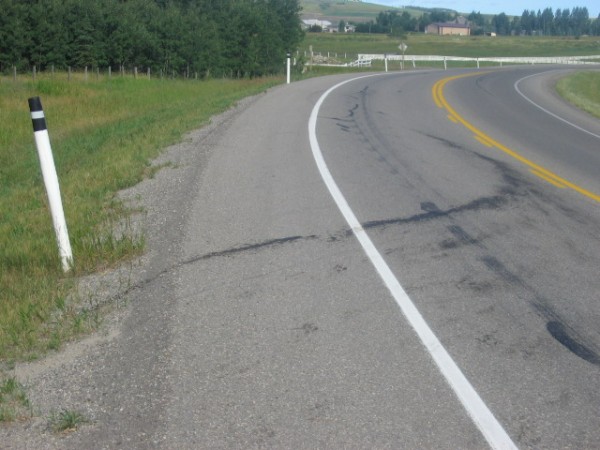
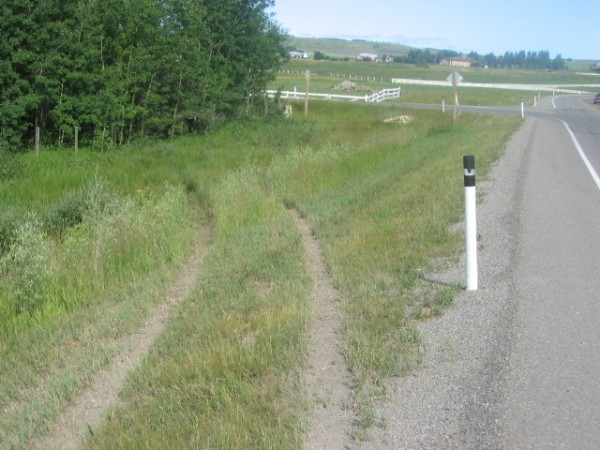
This is a neat picture. You can see the remnants of the 600W oil from the differential when the rear end split open from the impact of the other vehicle. You can actually see both the point where the truck collided with my roadster, and the stream of oil pointing to where I entered the ditch. The funny thing was that when the other driver turned himself in he told the police that I was in his lane. Nothing like a photo with a stream of oil from my car and in my lane as solid evidence.

IMG_0887

This is where the other driver entered the ditch and then drove off.

IMG_0937

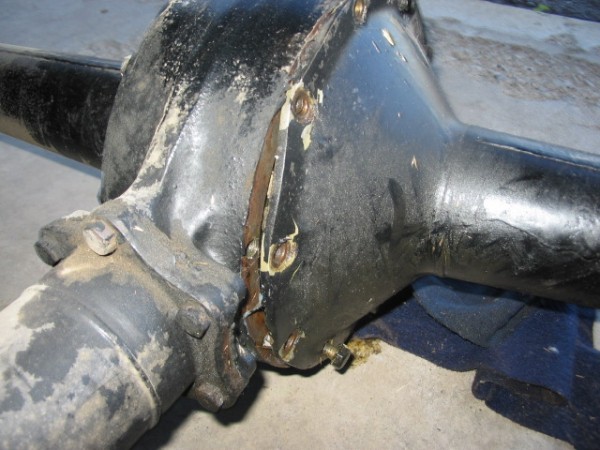
Here you can see the split open differential. The 600 W oil would have emptied very quickly.

IMG_0932

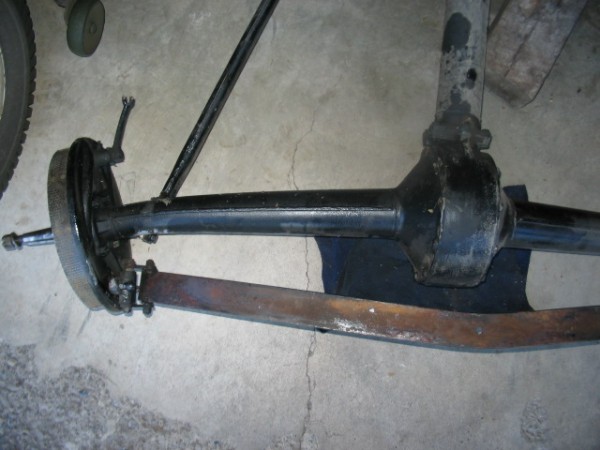
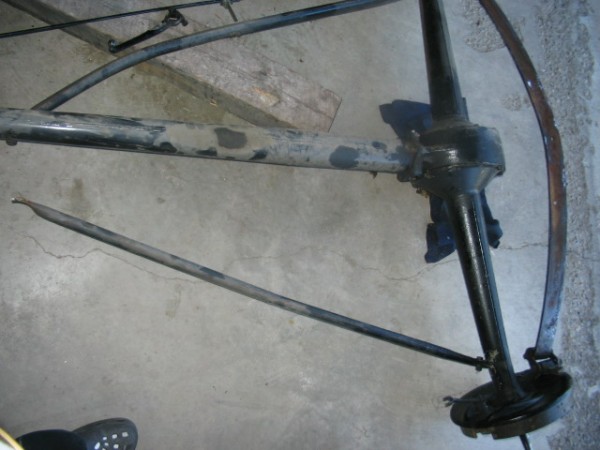
Once I removed the rear end from the car you can see just how badly bent the rear axle housing was.

IMG_0935

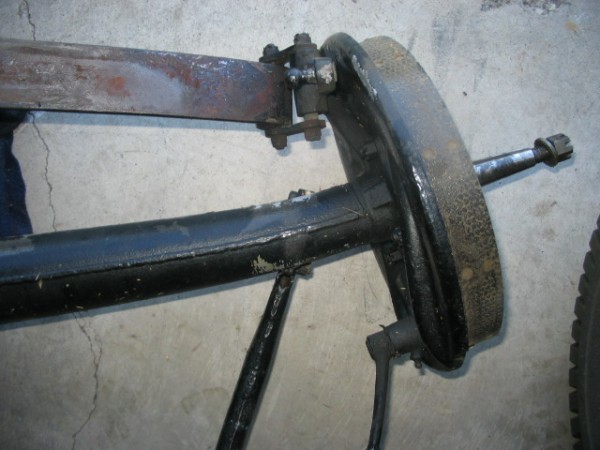
A little closer look at the rear brake housing plate. The impact also bent the rear frame cross member. I found a very good NOS one on the HAMB.

IMG_0934

Both rear radius rods broke away from the drive shaft housing and the brake rods both bent damaging the rear brake levers.

IMG_0962

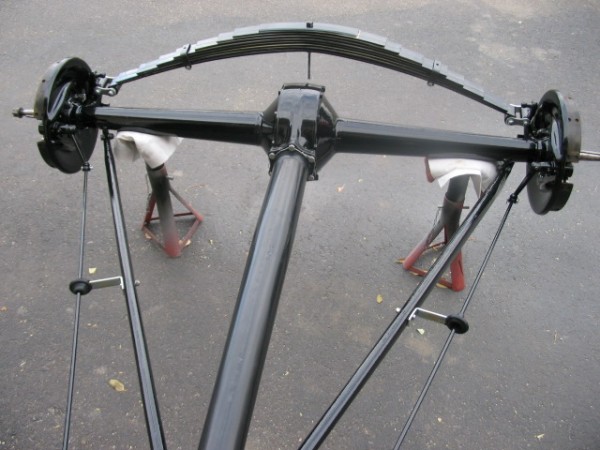
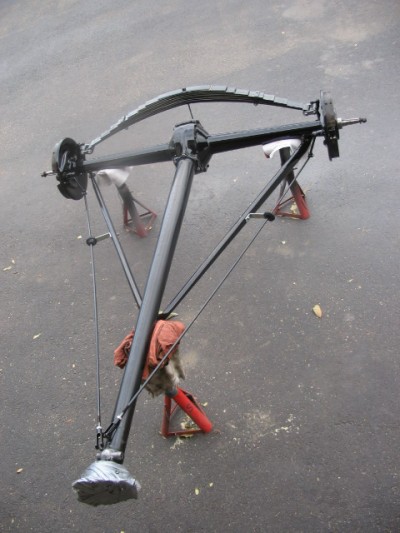
Digger on the FordBarn found me a good complete replacement rear end which I disassembled and went through mechanically, repainted and now its ready for installation back into the 34 frame.

IMG_0960

Another shot of the completely restored drive shaft, rear end. I know the 3 point jack stands aren’t that stable but my four point jack stands were holding up the car.

{ 2 comments }

One thing that I am not is a body man. I know my limitations, that’s why I hired Byron Valcourt, owner of Alternative Restorations, and his team to rebuild and eventually paint the complete 34 roadster body. His team is very meticulous and are doing a fantastic job fitting all the pieces back together. I look forward to my visits to his shop to see the progress unfolding. When the body is completed and ready for paint I plan on 3D laser scanning the roadster body which will provide everyone with a highly detailed and accurate 3 dimensional model of a 34 Ford Roadster body.

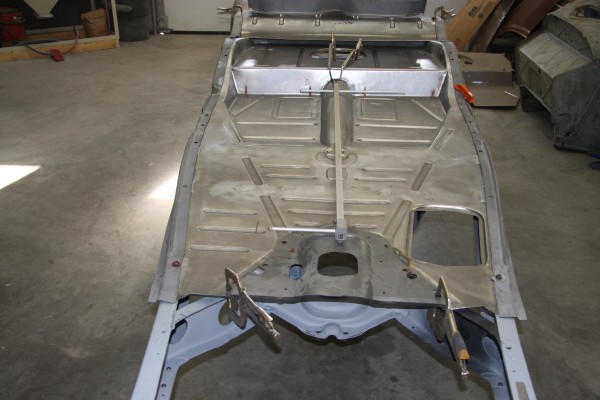
The frame is now restored but left in primer because they want to fit the floor pans and main body back on the frame. Once the body is fitted to the frame and we are completely satisfied with the fit of the body, including doors, they will remove the body and place it on a rotisserie for final prep and painting. The frame’s primer coat will be refreshed and then prepped for final painting. With the frame completed I will start assembling the mechanical components back onto the frame.

To date I have re-restored all of the mechanical components and they are waiting patiently in the garage to be rejoined with the frame. Once I have the frame back I will be detailing the reassemble of the mechanical components to the frame, stay tuned…
IMG_6021

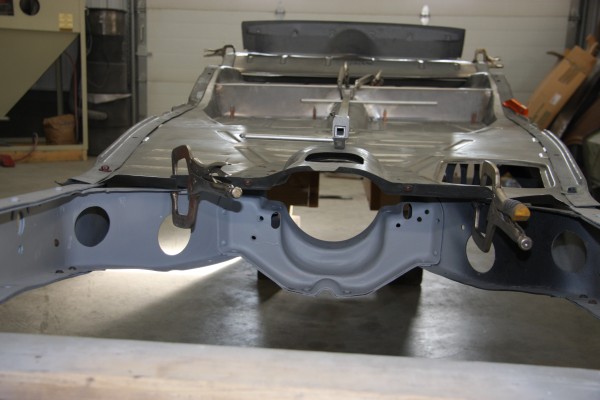
With the driver and passenger floor pan in place they are making sure the transmission cover fits properly. We also decided to replace both sub-rails which were purchased from Steve’s Auto Restoration. They also fit rather nicely but the guys at Alternative Restorations needed to make a few changes so they mimic the original sub-rails. I will detail what they mean in the next few weeks and keep adding to this post.
IMG_6016

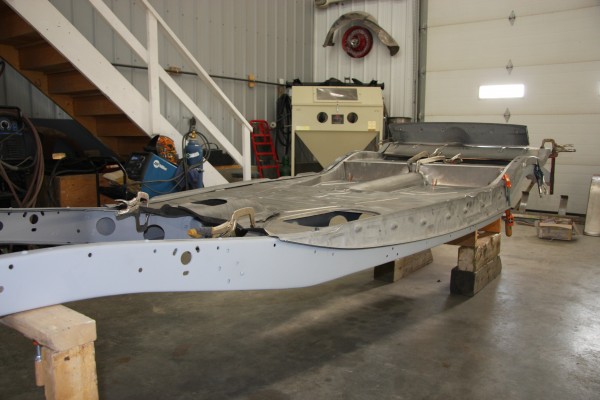
The side view shows the driver’s side frame sub-rail in place. If you look up at the top center of this picture you can see my damaged rear fender and wheel hanging on the wall. I must say that it adds a nice touch of original art work to Byron’s shop and its a reminder of what was and now what’s soon to be…
IMG_6023

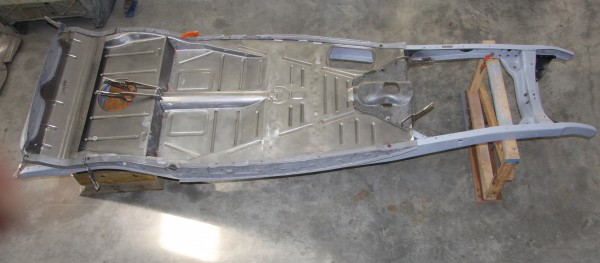
1934 Ford Roadster frame with floor pans

Most of the floor pans are in place and there still is some fitting to do with the rear sections of the floor pans.
IMG_6082

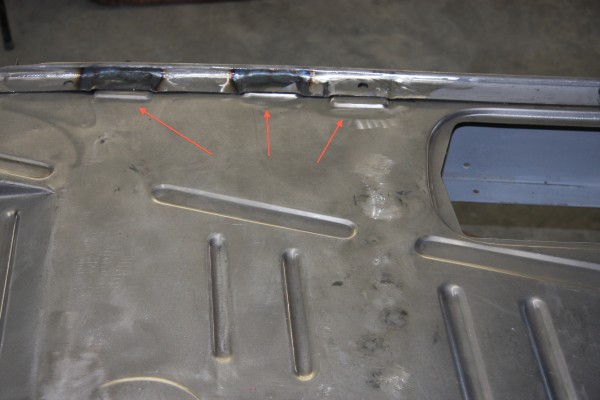
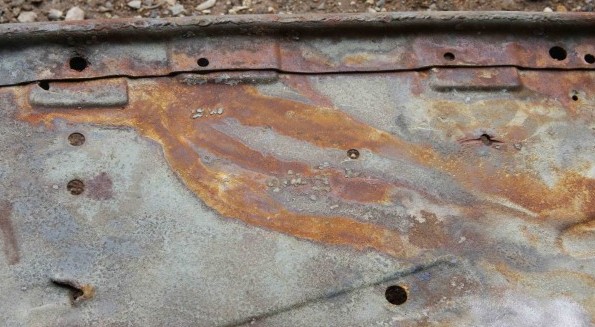
The replacement sub-rails were close to the original. However, they did need to be modified to match the original floor pan pattern. For example, if you look where the sub-rail lies on top of the outer edge of the floor the reproduction sub-rail did not have the indentations to match the floor pans and they do now! The original sub-rails matched this pattern of the floor pan as seen in the next photo that I forgot to take! I will take it on the next trip back to the shop.
IMG_6122

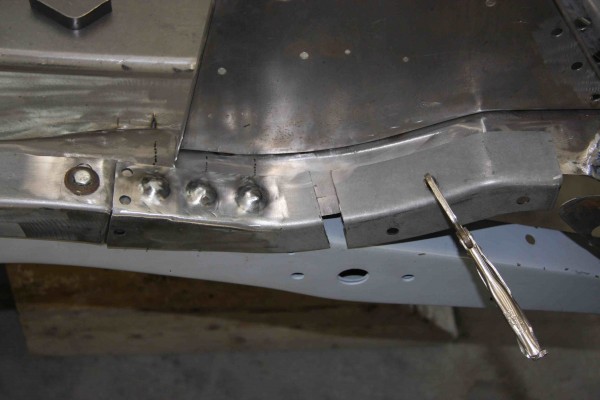
Here is the photo that I forgot to take and you can see the profile that was recreated in the above photo, into the reproduction sub-rail. In the photo above and of course this is the passenger side, damn. I meant to take the drivers side but you can see what I’m pointing out. Also you can see the repair weld on the top of the sub-rail and this is one of the many reasons that I decided to completely rebuild the car. There were many areas on the floor pans that were damage and one area was twisted at the sub-rail which could have been from the accident. Other areas of the body once stripped showed excessive bondo very poor repair welds and generally not a very good restoration. Whomever restored this car in the late 70’s must have been related to Micheal Angelo because the bondo body sculpting was absolutely incredibility straight and in some areas of the body the bondo was a 1/2″ thick. I must say that the car looked great and mechanically wasn’t that bad.
IMG_6090

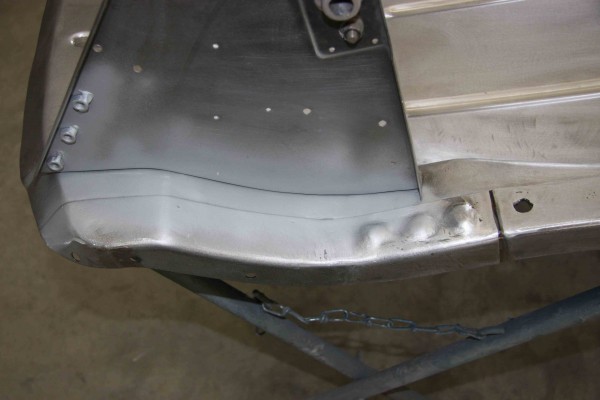
Also the tail pieces of the reproduction sub-rail did not fit properly at the rear of the frame and had to be modified, and the three bumps on the top of the sub-rail were not on the reproduction ones and had to be added as they were on the original sub-rail.
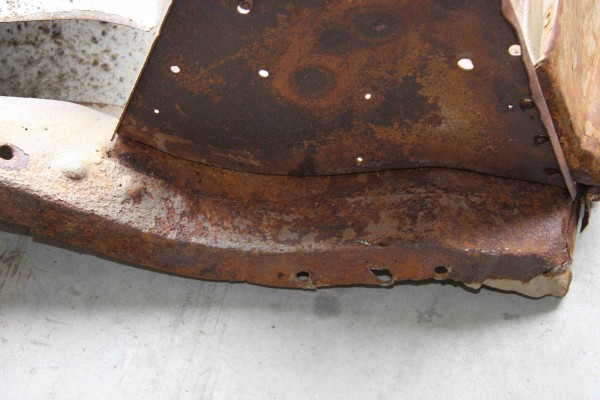
IMG_6123

This is the original profile of the drivers side rear sub-rail tail piece and you can see the three bumps that were recreated.
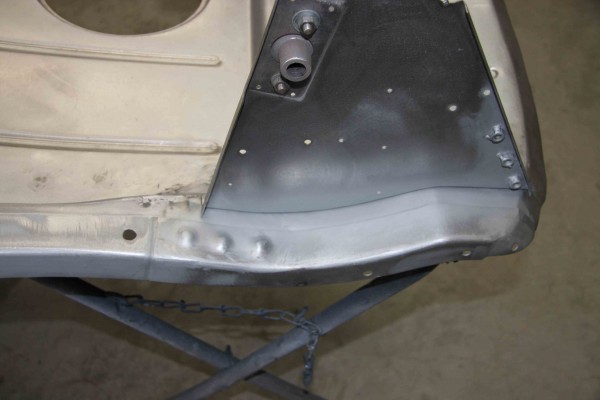
IMG_6102

The guys at Alternative Restorations have done a great job of completing the final fit of the rear frame sub-rail tail piece drivers side,
IMG_6103

and final fit of the frame sub-rail tail piece on the passenger side.
P1010494

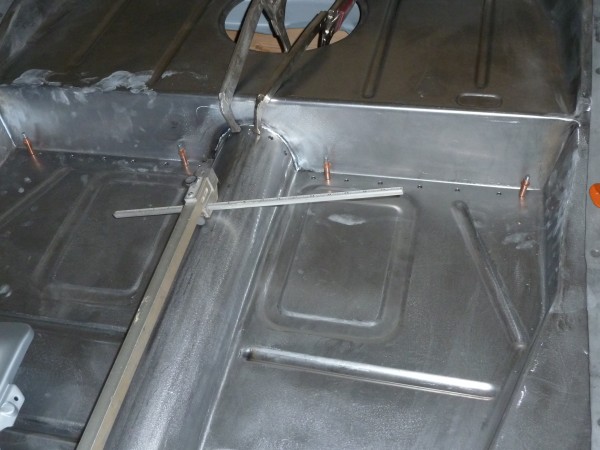
Here you can see the Cleco pins holding the center floor panels and drive shaft tunnel to the trunk floor pan. On the original floor pans the center floor and drive shaft tunnel overlap the trunk floor pan and were then spot welded together. For those of you who do not know the Cleco pins are basically spring-loaded, removable pop rivets that allow you to hold two pieces of sheet metal together in proper alignment for drilling, riveting or spot welding. This allows you to test-fit the panels before they’re permanently attached to your vehicle.
P1010495

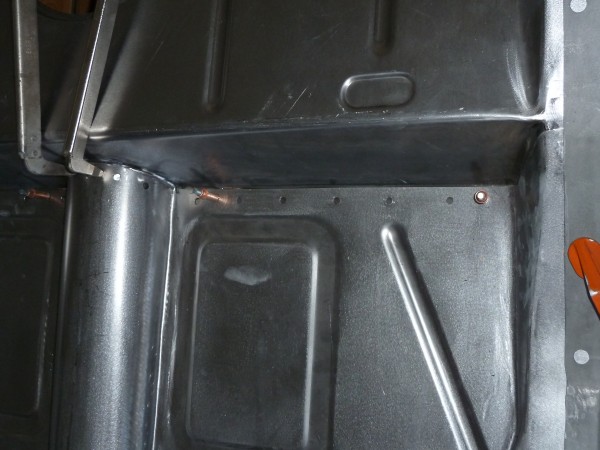
This is a better photo of the center floor pan and drive shaft tunnel overlapping the trunk floor pan.
IMG_6078

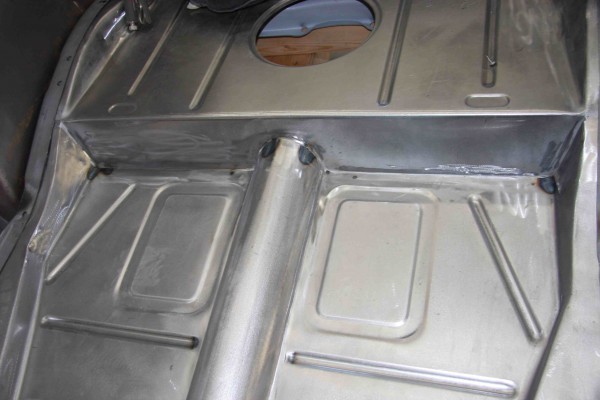
The completed floor pan with it spot welded in place.
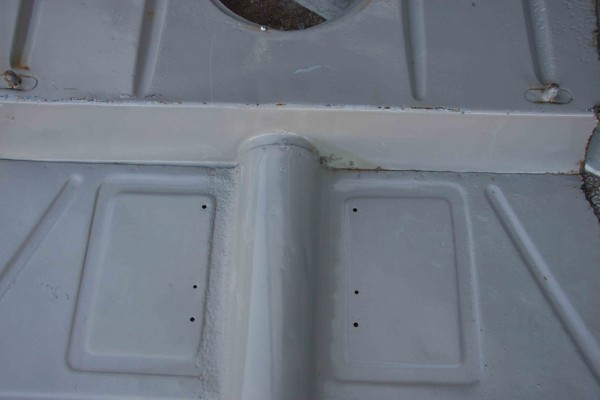
IMG_6091

In this photo of the original floor pan you can see where the floor pan overlapped the trunk floor pan.
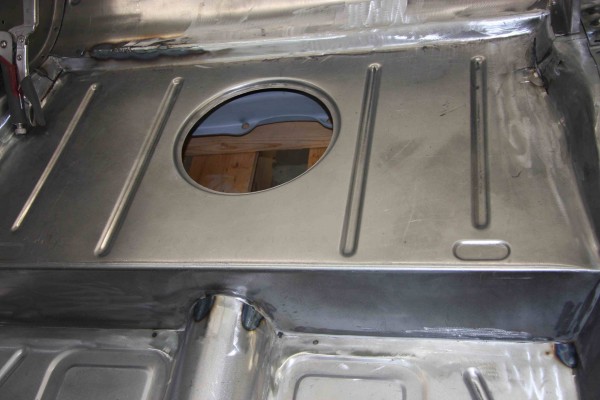
IMG_6093

If you look at the trunk floor pan on the reproduction floor pan the four strengthening ribs are in the correct position however they are a completely different profile from the original floor pan.
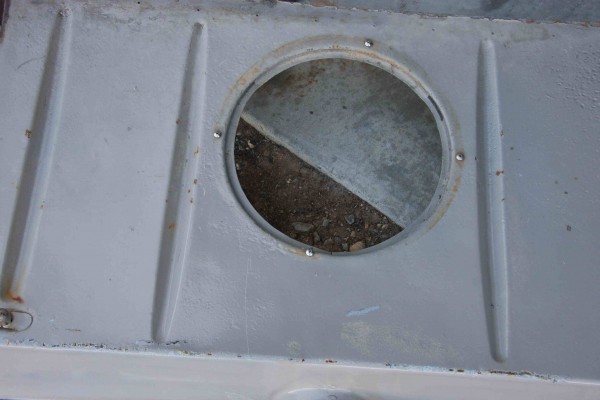
IMG_6092

On the original trunk floor pan the strengthening ribs are more ovoid.
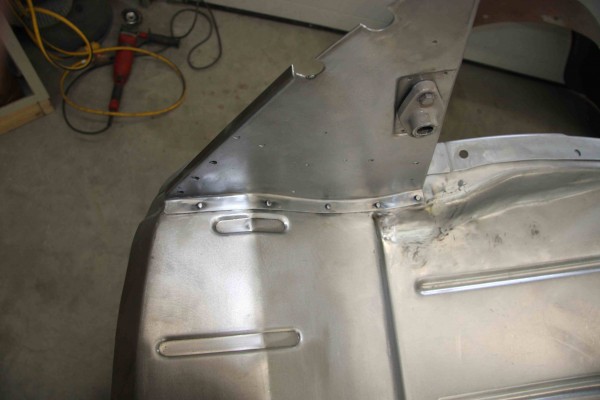
IMG_6101

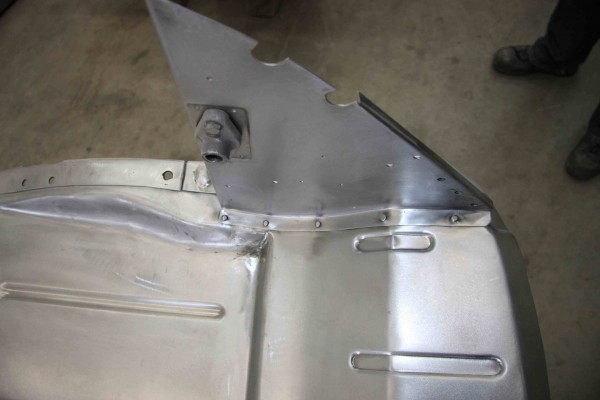
The lower inner trunk triangular rumble seat bracket has now been fitted and permanently riveted to the rear trunk floor they also serve as mounting points for the rumble seat hinges. I should note that we still need to cut the rectangular hole for the gas tank sending unit access cover.
IMG_6100

and both sides are now in place.

IMG_6111

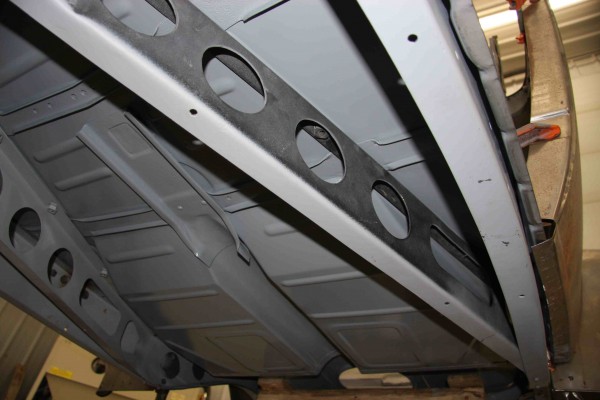
With the sub-floor now completely assembled it was removed from the frame and Byron put a coat of Dupont DTM epoxy on the bottom of the sub-floor this will help preserve it until the final priming and painting of the body.
{ 4 comments }